There's something extra special about holiday baking, from the warm spices to traditional recipes, to the joy of sharing your sweet creations with loved ones. Even if you already have a treasure trove of trusted recipes, we firmly believe there's always room for more!
Below are 10 baking books to use during the holidays, plus a free recipe for Winter Luxury Pumpkin Pie from Sweet! Trust us, you're in for a treat.

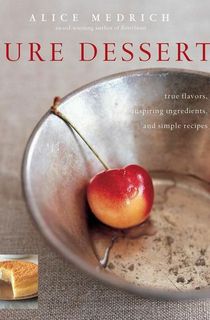
Pure Dessert
If you believe less is more, this is the baking book for you. Alice Medrich's stripped down recipes are devoid of glazes, fillings, and frostings, helping you keep dessert a simple affair. However, short ingredient lists don't mean these recipes are any less innovative or packed with flavor—from sesame brittle ice cream to souffles with unexpected flavors, any one of these desserts would be a showstopper at your holiday table.

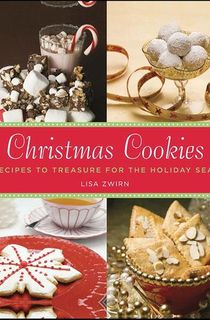
Christmas Cookies
Is there anything more synonymous with Christmas baking than Christmas cookies? Whether you need to leave out a plate for Santa, have a holiday cookie swap to attend, or simply love refilling plates of cookies while hosting your family for the holidays, this collection of 50 recipes has something for everyone. You can whip up a batch of Cocoa Meringue Kisses, Chocolate Peppermint Cookies, Ginger Coins, and many more!

Holiday Baking
If you want to introduce the next generation to holiday baking, this is the book for you! This beloved baking guide from American Girl makes for a fantastic gift and teaches lifelong baking skills such as piping and flooding icing, rolling out dough, turning cookies into ornaments, and much more.

Gluten-Free Baking for the Holidays
As gluten-free diets become more common, the quest to find gluten-free baked goods that actually taste good can be a difficult one. However, Jeanne Sauvage has cracked the code with her baking book that "shatters the assumption that if you can’t eat wheat, you can’t eat well during the holidays” (San Jose Mercury News).
This book contains favorite recipes like apple pie, rugelach, bûche de Noël, and even a gingerbread house, so no one will be left out at the dessert table.

Bake Me I'm Yours . . . Cake Pops
Perfect for beginners, this cake pop baking book includes step-by-step instructions for creating cute animals, festive Christmas characters, and tons of other creations you can enjoy year round. Holiday bakers will especially love the seasonal snowmen and forest friends, but you can reach for this book for baby showers, Halloween, and just about every other occasion.

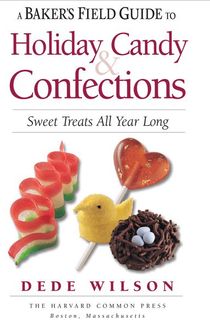
A Baker's Field Guide to Holiday Candy & Confections
If you're a baker looking for a real challenge, you'll love this book on candy making. Featuring candy recipes for just about every major and minor holiday, this extensive guide also includes each recipe's Habitat (country of origin), Field Notes (helpful information), and Lifespan (how long it will keep).

HomeBaking
This holiday season, take a trip around the world without leaving your kitchen. James Beard Award-winning authors Jeffrey Alford and Naomi Duguid have travelled everywhere from France to Fez and collected delicious dessert recipes along the way. Try your hand at cherry strudel from Hungary, Christmas stollen from Germany, Moroccan biscotti, and much, much more.

Seriously Bitter Sweet
For some of us, it isn't dessert if there isn't chocolate. And this baking book takes chocolate very seriously. Since terms like "bittersweet" and "semisweet" have been overtaken by specific percentages in the chocolate world, Medrich updated her 2004 award-winning book to reflect that.
This baking book offers desserts ranging from savory to sweet and using a wide array of different chocolate percentages. And don't worry—adaptions are included so you can use any percentage you have on hand.

Della Fattoria Bread
If your baking tends to be more savory than sweet, then the holidays mean homemade bread for the table. After all, baking books don't just have to be dessert (though the brioche or challah from this award-winning bakery's cookbook could stand in for cake any day).
Whether you're a bread baking novice or have already named your sourdough starter, there are recipes for all experience levels in this book. Impress your guests with all kinds of loaves, from baguettes to breadsticks and more.

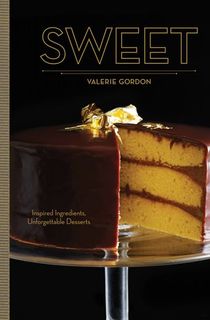
Sweet
Famous for her Los Angeles boutique, Valerie Gordon invites readers to recreate her confections in this James Beard Award-nominated baking book. Your holiday table isn't quite complete without one of her delectable desserts, whether that's quince and pear pie, tiramisu trifle, Champagne cake, or another one of her goodies. Don't believe us? Check out the recipe for her Winter Luxury Pumpkin Pie, below!
Winter Luxury Pumpkin Pie

I know that roasting a whole pumpkin is a bigger time commitment than opening a can of pumpkin filling, but the flavor is absolutely incomparable. The wise farmers at Windrose Farms in Paso Robles, California, introduced me to the Winter Luxury variety of pumpkin at the Santa Monica Farmers’ Market. A sign next to their pumpkins read, “Best Pumpkin Pie Ever!” They weren’t lying; the pies I make with their pumpkins taste like roasted, caramelized pumpkin. The flavors are nuanced, the texture is silken, and it is an experience that will never be found in a can. Serve at room temperature with a large dollop of Vanilla Whipped Cream.
makes one 9-inch pie; serves 6 to 8
- One 3- to 4-pound pumpkin, preferably Winter Luxury
- 3/4 cup (4.5 ounces) light brown sugar
- 3 large eggs
- 1 teaspoon ground cinnamon
- 1/2 teaspoon ground ginger
- 1 teaspoon kosher salt
- 1/4 teaspoon ground cloves
- 1 tablespoon cornstarch
- 1/2 cup (4 ounces) crème fraîche or heavy cream, plus more if needed
- 1/2 recipe Pie Dough
- 1 1/2 teaspoons Pie Dust
- 1 egg, beaten
- 1 teaspoon granulated sugar
Position a rack in the center of the oven and heat the oven to 350°F. Line a large baking sheet with parchment paper.
Using a sharp chef’s knife, cut the pumpkin in half. Scoop out the seeds. Place the pumpkin cut side down on the prepared baking sheet and roast for about 40 minutes, until the flesh is very soft. Pierce it with a fork to check for doneness. Let the pumpkin cool completely.
Scoop the pumpkin flesh out of the skin and puree in a food processor or blender, scraping down the sides once or twice. Reserve 11/2 cups of the puree for the filling. (The extra puree can be packed into a Ziploc freezer bag and frozen for up to 3 months.)
In the bowl of a stand mixer fitted with the paddle attachment (or in a large bowl, using a handheld mixer), beat the brown sugar and eggs on medium speed until blended, about 1 minute. Add the pumpkin puree and beat until smooth. Scrape the sides of the bowl, then add the cinnamon, ginger, salt, cloves, and cornstarch and beat until incorporated. Add the crème fraîche and beat until incorporated, about 30 seconds. If the filling looks stiff, add more crème fraîche 1 tablespoon at a time. (The filling can be stored, covered, in the refrigerator for up to 2 days.)
Remove the dough from the refrigerator and place on a floured cool surface. Using a rolling pin, roll the dough out into a 13-inch circle: Start from the center of the dough and roll outward, rotating the dough 2 to 3 inches after each roll—this will help create a true circle. After every four to five rolls, run a large offset spatula under the dough to release it from the work surface. Add a little flour to the surface, rolling pin, and/or dough if the dough sticks or becomes difficult to roll.
Roll the dough up onto the rolling pin, then unroll into a 9-inch pie pan, centering the round. Gently press the dough into the bottom of the pan and against the sides, making sure there are no air pockets. Press the dough against the upper edges of the pan so it extends about 1/2 inch beyond the edges, then trim any excess dough with kitchen shears. Crimp the dough, following the single-crust crimping instructions, opposite. Chill the crust for 15 minutes, or until the dough is cool and firm.
Cover the bottom of the crust with the pie dust. Pour in the filling. Using a pastry brush, paint the crimped edge of the dough with the beaten eggs, then sprinkle with the granulated sugar.
Place the pie on a baking sheet and bake for 30 minutes, or until the edges of the crust look golden brown. Remove the pie from the oven and cover the edges of the crust with a pie ring.
Bake for an additional 25 to 35 minutes, until the edges of the filling are set but the center jiggles slightly when the pan is gently shaken. Start checking the pie after 20 minutes, then continue baking, checking at 5-minute intervals. Remove the pie ring and bake for an additional 5 minutes, or until the pie is just set. (Do not bake the pie so long that it starts to brown on the top.) Transfer the pie to a cooling rack to cool completely.
storing
The pie can be stored in the refrigerator, covered, for up to 2 days.
Pie Dough
Given the choice between a piecrust made with butter and one made with shortening, I always choose butter. If you keep your dough cold at every step of the way, you can achieve the same flakiness that people attribute to shortening with the incomparable flavor of butter.
makes enough for one 9-inch double-crust pie, two 9-inch single-crust pies, or fifteen 4-inch hand pies
- 2 1/2 cups (12.5 ounces) all-purpose flour
- 2 teaspoons sugar
- 1 teaspoon salt
- 2 1/2 sticks (10 ounces) unsalted butter, cubed and chilled
- 1/4 to 1/3 cup (2 to 2.5 ounces) cold water
To make the dough in a food processor: Put the flour, sugar, and salt in the processor bowl and pulse once or twice to combine. Drop the pieces of butter through the feed tube, continuing to pulse until the mixture resembles coarse crumbs. Slowly add 1/4 cup water as you continue pulsing a few more times, then add more water if necessary; stop when the dough just starts to come together.
To make the dough by hand: Put the flour, sugar, and salt into a medium bowl and mix together with a fork or small whisk. Cut the butter into the dough using a pastry cutter or a large fork until the mixture resembles coarse crumbs. Drizzle 1/4 cup water directly over the dough, mixing with the pastry cutter or fork, then add more water if necessary, mixing until the dough just comes together.
Remove the dough from the processor or bowl and form into 2 equal disks. Wrap each disk in plastic wrap and refrigerate for at least 2 hours, or up to 3 days. The dough can be frozen for up to 2 months; thaw in the refrigerator.
Pie Dust
A scant sprinkling of this simple mixture prevents piecrusts from getting soggy on the bottom; I use it with all wet pie fillings.
makes 1/2 cup
- 1/4 cup (1.25 ounces) all-purpose flour
- 1/4 cup (1.75 ounces) sugar
Sift the flour and sugar together into a small bowl. The pie dust can be stored in an airtight container for up to 6 months.
Keep Reading: 7 Thanksgiving Cookbooks to Elevate Your Holiday Meal
Featured photo: Element5 Digital / Unsplash
